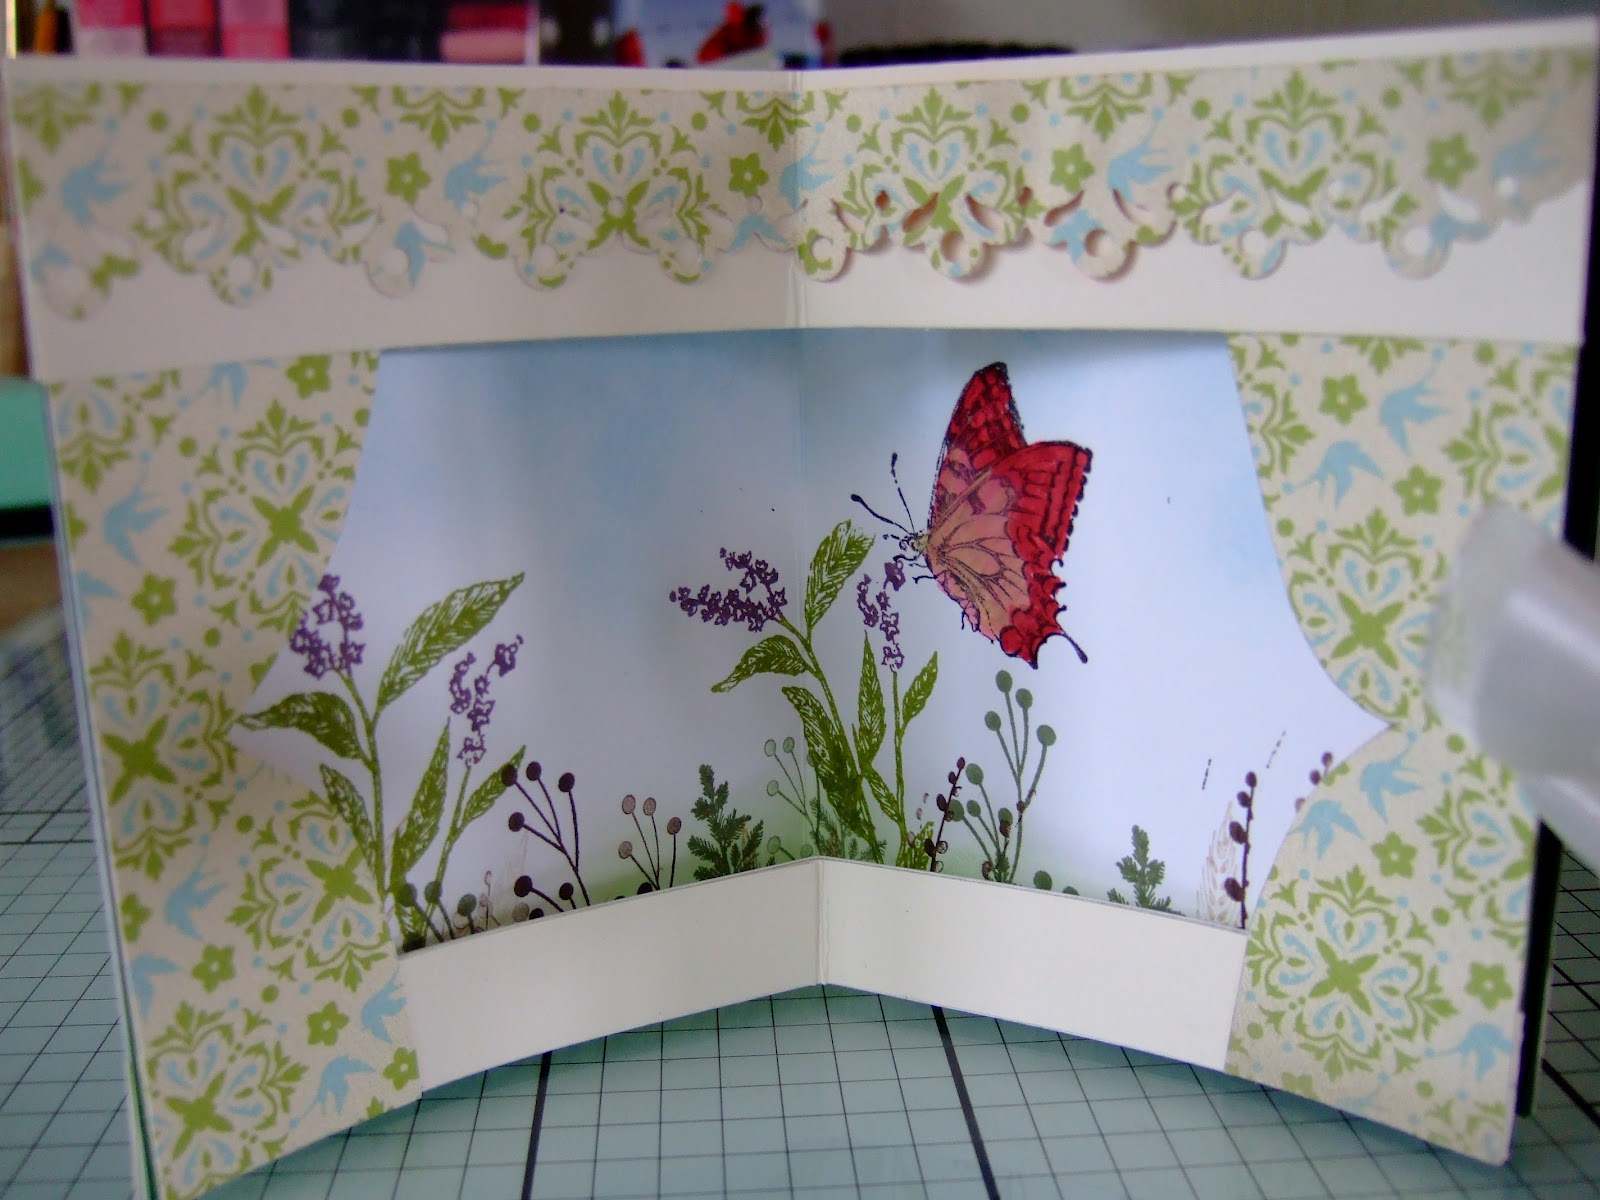
On Friday I posted
this card and promised a tutorial on how I made. This is the first time I've written a tutorial, so let me know if there's anything that isn't clear and I'll edit it accordingly!
I will give the supplies list that I used, but I do understand that you might prefer to use other products.
Materials
Stamps: Autumn Days, Nature Walk, Lovely As A Tree, All A Flutter, Faith in Nature
Ink: Bashful Blue, Wild Wasabi, Early Espresso, Crumb Cake, Always Artichoke, Basic Black, marker pens in Perfect Plum, Old Olive, Bashful Blue, Riding Hood Red, So Saffron, More Mustard
Card: Whisper White, Very Vanilla, Forest Green (non-SU)
Paper: Everyday Enchantment Designer Series paper
Other: Simply Scored board & metric board, Lacey Leaf border punch (non-SU), Whisper White 5/8" Organza Ribbon, sponge daubers
Right, let's get cracking:
Cut out five pieces of white card measuring 17cm by 10cm.
Using your preferred means, sponge on a pale blue ink for the sky and a green for the ground. You will have to come quite far down the card (about half way) with the blue ink. I used
sponge daubers to ink with as I find them very easy to use, together with
Bashful Blue and
Wild Wasabi ink.
Once you are happy with your inking, here is the fun bit! Collect together your foliage stamps and ink them up in your chosen colours. Don't feel you have to ink up the stamp every time you stamp with it: stamp two or three times gives a good sense of perspective to your scene. I stamped the wheat stamp from
Autumn Days in
Crumb Cake, the longer grass stem from
Autumn Days in
Early Espresso, and the silhouette type grass from
Autumn Days in
Early Espresso and
Always Artichoke. I added in just the top of the pine tree stamp from
Lovely As A Tree in
Always Artichoke as it works great as a general foliage stamp in this way. I stamped the wild grass stamp from
Nature Walk in Old Olive and Perfect Plum (colouring in the stamp directly with my marker pens).
Add in some insects into the scene: I used the bees and the smaller butterfly from
Nature Walk and the big butterfly from
All A Flutter. These were stamped in
Basic Black and then coloured in directly with
markers, or with my blender pen and markers (the colours I used were
Riding Hood Red, So Saffron and More Mustard).
Cut five pieces of green card 20cm lengthways x 10cm high. Score and fold these down the halfway point (10cm). Also score and fold the stamped scenes you've just made down the halfway point (8.5cm).
Cut a sixth piece of green card measuring 21cm x 10cm and score and fold at 10cm, 10.5cm and 11cm.
When your cat decides it's bedtime, make sure you give him/her plenty of attention and obey immediately.
You will make him or her very happy!
Start again the next day. Cut out five pieces of
Whisper White card measuring 15cm x 10cm. (If you use another brand of white card, make sure it's not too thick. Remember it's going to be folded in the middle of the book.)
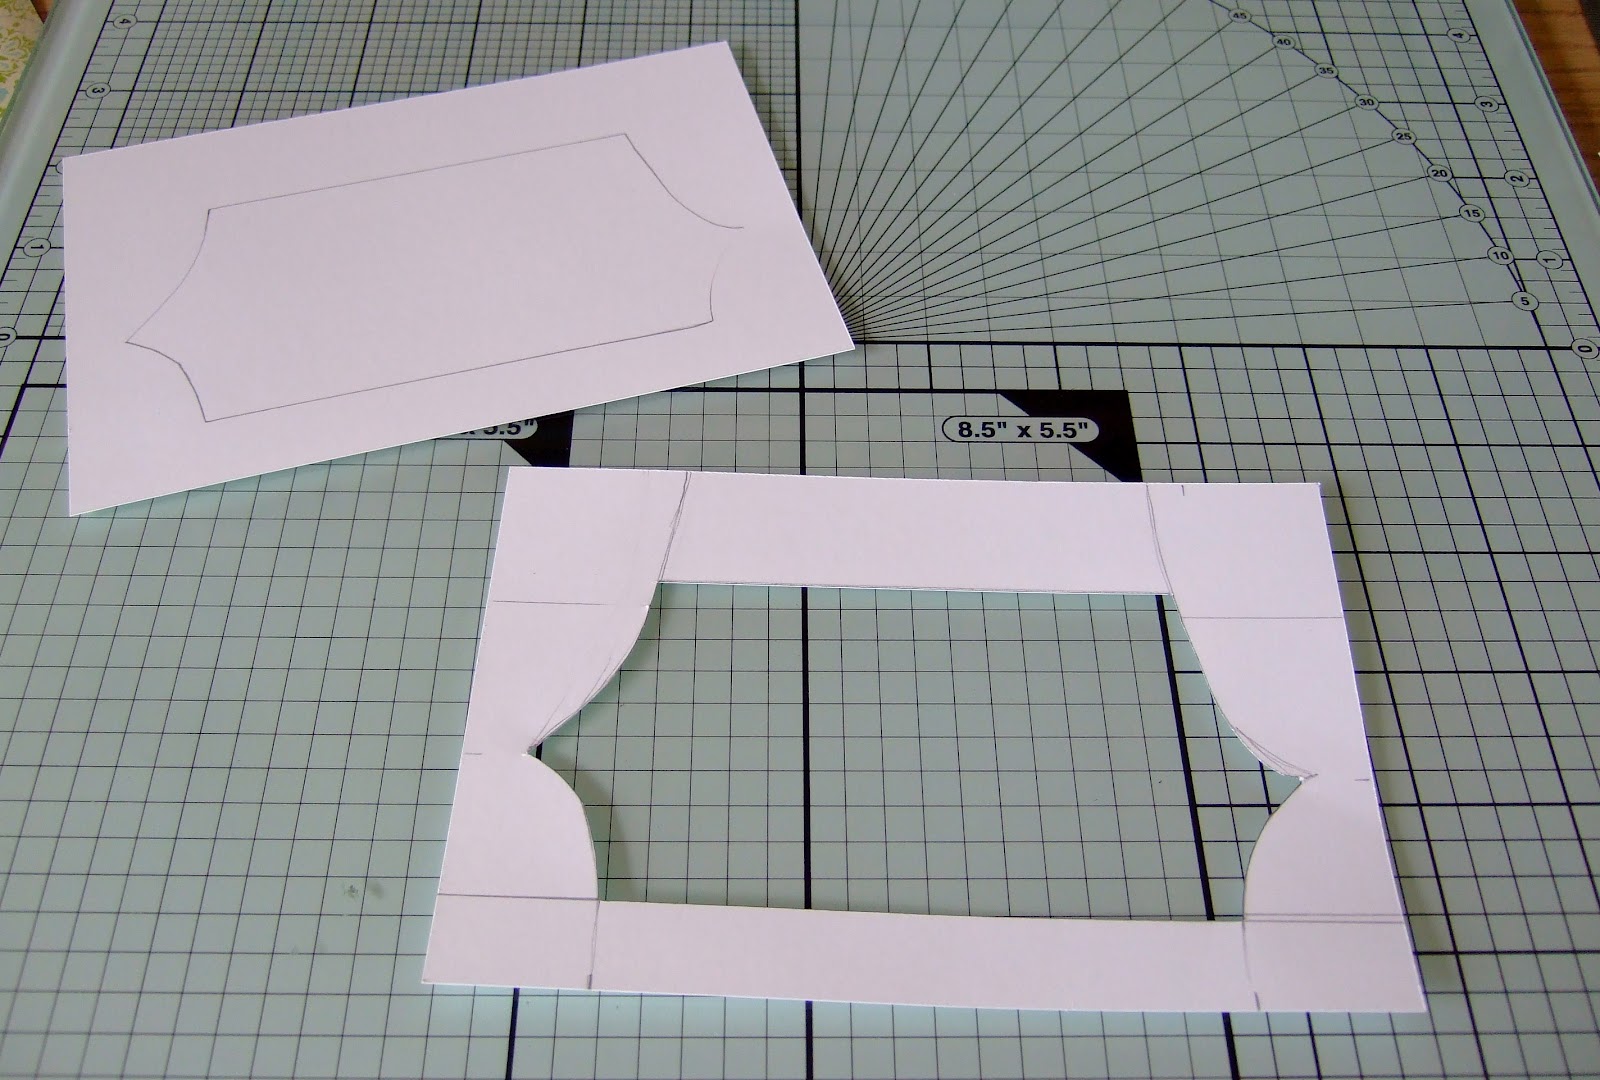
Measure 2.5cm down from the top and draw a pencil line. Do the same 1.5cm up from the bottom edge. Draw your curtains so they are relatively equal on either side. I did this by making a pencil mark where I wanted them to start and end on each side and drawing free hand.
When you happy with your window, cut out the middle and use it as a template for the other four pieces of white card.
Cut out five lengths of 15cm x 1.5cm of
Very Vanilla card. Stick to the bottom length of your white base pieces. (I forgot to do it in this order which is why the photos seem a bit out of sequence!)
Use one of your windows as a template to draw out your curtain shapes onto patterned paper. I used this lovely sheet of
Everyday Enchantment because it coordinates well with the colours in the garden scene. You will need five left curtains and five right curtains. You might want to ink the edges a little depending on the paper you use.
Cut out five pieces of
Very Vanilla card, measuring 15cm x 2.5cm. Then cut out five pieces of the same patterned paper, measuring 15cm x 2cm. Punch down one edge with a border punch. Adhere the patterned paper to the Very Vanilla card, and then stick onto the white base piece. Do this for all five pieces.
Stop for a snack. I recommend homemade white chocolate and summer fruits cheesecake. ;-p Yum!
Put double-sided tape down the edges of each of the five green pieces of card and adhere the stamped scene in place, taking care to line up the edges carefully. This is crucial! You are not sticking down the whole thing!
Do the same thing with the window panel. You are only adhering the very edges. I used the really thin strips of double-sided tape for this bit. Do this for all five panels.
Adhere ribbon securely with tape onto the back of one of these panels. Cut off a good length of ribbon.
Take your front cover piece (the green card measuring 21cm x 10cm). Line up the window panel you've just stuck the ribbon to with the front cover and stick together (the whole thing this time, not just the edge). As you have three scored lines on the cover and it is 1cm longer than the other panels, it looks like it will stick out by 0.5cm in the centre - that's OK! - you need the extra length to work well as a cover for the book when it's closed.
Repeat this to secure the ribbon to the back of the cover and stick in another of your window panels.
Now it's a case of sticking in your other window panels. I do like double-sided tape as it's a strong dry adhesive and holds the panels in place, but use the adhesive you prefer.
Your book will now look like this:
Cut a piece of
Very Vanilla card, measuring 9cm square. Stamp your front panel. I did mine by colouring in the quotation from
Faith in Nature in
Old Olive and
Perfect Plum markers, adding in the wild grass stamp from
Nature Walk in the same colours. The butterfly, also from
Nature Walk, was stamped in
Basic Black, and I coloured it using my blender pen and
Riding Hood Red and
So Saffron. Attach to the front of your book.
In the photo above, you can see why those extra scored lines and extra 1cm are so important for the front cover.
When you undo the ribbon, you can pull the front and back covers round to create a star shape:
See the
original post for more close-ups of the stamped panels.
Voila! Of course you might want another snack by this point and your cat will almost certainly want some attention!
Hope this is relatively clear, but do let me know if any of it is confusing. If any of these supplies have caught your eye, please do not hesitate to get in touch either by phone on 07977 141605 or by
email. I'd be delighted to assist you with your crafty makes and place an SU order for you. If the patterned paper has caught your eye, it's limited edition and you only have until Tuesday to order it, so don't hang around!
If you make a star card using this tutorial, I'd love to see what you make, so do post your link in the comments.
Thanks for visiting and well done for surviving a very very long blog post!